

SVG
!SVG
As a break from doing main OS stuff in the evenings, after RISC OS 4 was released, I wanted to do something different, which hadn't been done before for RISC OS, and which would be interesting to me. SVG had caught my eye previously because it offered a platform independent way of representing vector graphics. Previously vector formats had never really caught on (away from RISC OS), and having some support for this format would be quite neat. Plus it was still in draft, so there was some scope for getting in early and actually being able to implement the standard, before it inevitably got enhanced with other features which I could never hope to keep up with.
The closest representation to SVG on RISC OS was DrawFile, so I chose to create a tool that would convert from SVG to DrawFile. Actually, once you have parsed the format, the output isn't too relevant, but as only DrawFile supports much of the feature set, it was the most obvious. I could have chosen !ArtWorks format, but that would not have been as transferable for other RISC OS - everyone had !Draw, but not everyone had !ArtWorks.
SVG is an XML based format. Which means that in order to be able to get at the data within it, you need to be able to parse XML. Which meant I needed a way to do that - so, I ported the 'expat' XML library, and created the ParseXML module from it. This was a bit poor really, because it essentially meant that the callback-based expat parsing was being serialised into a walkable structure which could then be delivered to the application... which would then use a callback-based dispatch to decode the elements within it. I wasn't at all happy with this, but as you cannot have SVC mode code calling down to USR mode code in modules, it was what I had. I considered the possibility of using a special compilation to create reentrant code which could work with the new format, but the effort involved there would have been significant.
Having got an XML parser, I began to write the code to convert the SVG structures to an internal representation (very close to DrawFile) which could then be output. I knew from the start that I was never going to be able to do everything. Things like filters, scripts, animation points, opacity, patterns and clipping (to name just the few that come to mind) just were not possible in the DrawFile format, so they would not be supported. Even things like text were trickier, because DrawFile places constraints on how you construct it - for a start, it expects that the code that constructs the text objects actually has the fonts it needs available so that it can work out the size of the bounding box.
I started out with the basic objects - poly-lines, rectangles, circles and similar. These were pretty simple to implement because they had direct analogies in the DrawFile. Groups were similar, but once I reached this point I discovered that I had missed a subtlety about the coordinate systems. Whereas DrawFile has its coordinates based at the bottom-left going up and right, SVG based its coordinates at the top-left going down and right.
This meant that in order to ensure the things appear the right way up, the coordinates needed to be inverted. Not difficult, but it meant that all the coordinates weren't the same on input and output, which made debugging a little more interesting. It also introduced the need for transformation operations on the decoded data - which I knew I would need because the specification allowed for transforms on any element.
One common way of creating SVG objects at the time seemed to be to construct the shape around 0,0 and then transform it to a destination location in the workspace. This made it very simple to import other objects into a document, I expect. Adding support for the transform attribute wasn't too difficult really.
Browser plug-in
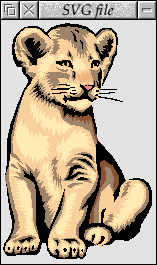
Aww, so cute!
Having got a working (and mostly useful) command line converter,
I created a front end which could process them and display the results.
This wasn't particularly complex - the TaskWindow library from !BCTD
made it easy to drive the command line tool to convert from the input
file to a DrawFile. The PlugIn library from !AMSpectre (which in turn
had been derived from !DrawPlug) was used to create a browser plug-in
that would allow the browser to render the images in place. The
libraries had, by then, been centralised into my own build system
so that if I needed to build any component it would recursively obtain
the necessary bits from other dependencies.
The SVG plug-in application wasn't too complicated - essentially all it was doing was taking input from a source (filesystem or browser), feeding it to a converter (my 'ConvertSVG' tool), and then rendering it in a window. I added support to allow the image to be saved, and copied to the clipboard as well. Later there was support for processing related resource (eg JPEGs which were referenced by the SVG), which was done very tackily - the command line tool would request the resource in the TaskWindow output, and the plug-in would recognise this, request the data from the browser and when it received the data it would place it in a file and pass the filename to the converter by sending it as the standard input.
Back at the command line converter
I wrote a simple style library which could take basic CSS declarations and apply them to existing styles. This became a little module called StyleMan which the decoder used to keep track of its stylings. It was a fairly complete style declaration parser, although it didn't handle anything complicated like inheritance or relative styles, which was a little bit of a limitation.
I needed another library to handle decoding colour specifications, as there were quite a few ways in which CSS could declare colours and the example SVG I was working with used many of them. I extended the WebColours module which I had created some years before so that it understood the CSS colour specifications, and used that.
The DrawFile library I was using had initially been a part of the map generator in !DoomPS - a Doom mapping tool, which created PostScript or DrawFiles. I moved the actual implementation out of the !SVG code into a library that was shared between both !DoomPS and !SVG. This meant that any updates became useful to !DoomPS as well. Shortly after doing that I found that there were problems with the scaling in the SVG library.
I had started out using integers for everything in the library, because that was simplest, but many of the SVG inputs used very large or very small values which were then transformed to the correct size in an outer transformation. The way that my parser worked was to use the explicit sizes supplied and only when recursing back to the containing elements apply the transformations. This meant that precisions got lost and sometimes the numbers overflowed.
I updated the DrawFile library to use floating point numbers instead, which made things a lot more interesting in terms of performance. The DrawFile library had started out using very few references where the data might need to be manipulated. This meant that most coordinate blocks and transforms were passed by value, rather than passed by reference. This was intended as an experiment to see how code performed when you did this.
Changing the values to be floating point expanded that experiment significantly to FP values, and therefore both more emulated instructions and larger data structures. In some cases I changed back to pass by reference where I thought it appropriate, but the code got significantly slower - slower than just the FP change might account for. The pass by value really hurt.
I kept this, though, as that was part of the experiment - can you
write some useful application using the pass-by-value and does it
make the code clearer? Overall the answer (I think) was that the
code is not significantly clearer, and whilst you no longer have to
remember that the data you are passed is not writable, you could
have that sort of thing enforced by just using 'const' appropriately.
Anyhow... with the addition of more accurate floating point values, many SVG images worked better. I had been using the test suite which the SVG group had produced, and keeping track of the pass rate I was getting, which made it easy to see that I was making progress. The addition of the full CSS colour handling, rather than my simple original code made a big difference to the number of passing (or partially passing) tests.
Handling of text was hard, as I have mentioned, because there is usually not enough information to produce a fully specified text element in the output. Because text origins could be positioned in SVG at either end of the text, or centred, the size for the text still needed to be calculated - and because the actual origin in the DrawFile was the bottom left of the text area, just inverting the image vertically had odd effects on the text positioning. I don't remember what exactly happened there, but I do remember getting a lot of strange results until I stepped back and thought about the different coordinate systems in use and the constraints on the text areas.
Text styling could only be done in a limited way - for example, it wasn't possible to use outline text, because there was no way to specify that in DrawFile (or to FontManager).
Late on I added support for markers - shapes which would be placed at
the start and end of paths. In SVG, such markers were specified by
reference, using explicit identifiers ('id' attributes), so the code
began to understand that there could be references to other areas in
the code. This would have made it possible to provide declared fonts
through the 'defs' sections in a later version, but that was never
implemented.
Again, late on, I created a DrawFile to SVG converter - someone else had already created one, but I wanted to at least have both sides of the conversion implemented myself. It is significantly easier to convert in that direction. So much easier that I rewrote the whole conversion again from scratch inside !Draw when I added SVG export to it, and then extracted that code out into the DrawFile module so that it could work with ImageFileConvert - the DrawFile module having a very slightly different way of handling RISC_OSLib DrawFile structures to that !Draw which meant it wasn't a plain drop-in.
The actual application was released through Warm Silence Software.
Some people actually bought it - it wasn't that expensive and it
was never described as a complete SVG handler. It could have been
better, but there was never going to be enough interest in it back
then. That said, I am repeatedly amused by
the Internet Explorer Blog from Microsoft telling people how to
use SVG and the like. Yeah, welcome to the show, guys ![]() .
(yes, I know their implementation is more complete, and they
handle it a whole lot better than mine, but my SVG plug-in was an
after-work project by one person and they are a massive corporation
coming in late to the game and telling people how to do stuff - I
think I can be a little amused).
.
(yes, I know their implementation is more complete, and they
handle it a whole lot better than mine, but my SVG plug-in was an
after-work project by one person and they are a massive corporation
coming in late to the game and telling people how to do stuff - I
think I can be a little amused).
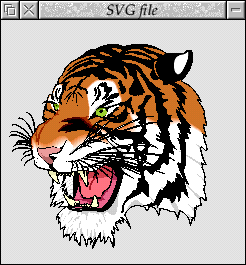
I had a cute little lion to test with,
but I also had a scary tiger!
The tiger rendered as an
<object> in your browser.
All in all the converter did reasonably well, given the restrictions. My notes here says that the major things that we cannot do:
- Opacity
- Text outlines
- Foreign text not supported (no UTF-8)
- Clipping
- Bitmap images
- Patterns (gradient fills, bitmap based effects)
- Zoom and pan
- Linking
- Scripting
- Mitre limits cannot be specified in Draw files
I ranked the test results compared to the reference by how well it implemented the features required :
- CORRECT - Test passes 100%
- PARTIAL - Test passes with the above exceptions
- FAIL - Test fails on any number of counts
- IGNORED - Test is not useful within this plug-in
- Correct: 12
- Partial: 31
- Fail: 77
- Ignored: 7
The vast majority of the failures were due to CSS colours handling not being quite right. The test suite itself was pretty easy to see the results of, as it placed a 'good' PNG image alongside the plug-in version. For some it was very obvious that there were problems. For others it was really nice to see it worked quite well.
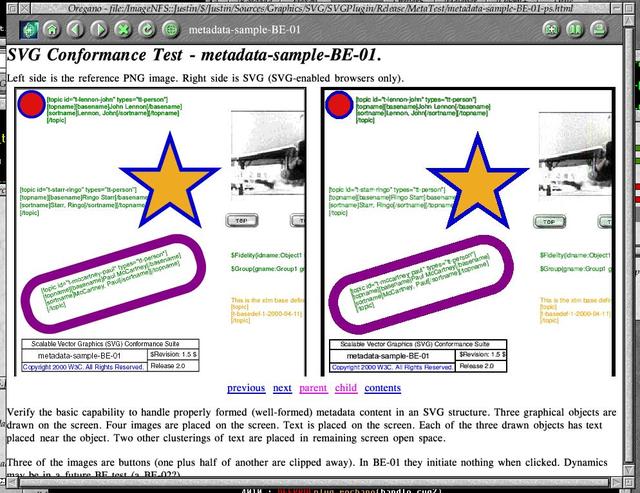
(Larger version (170K))
Homeworld
Relic released the source to Homeworld - and I didn't notice. It was only a little while later whilst looking for something else that I discovered that they'd released it, and then I was excited. I had loved Homeworld in both campaign and the 'against the computer' multi-player - and been slaughtered by Matthew Bullock on the few times when we had played together. So I rushed to grab the source and set about seeing what I could do with it.

My 2D RGL test.
The source is quite modular, although the dependencies aren't really
specified anywhere. I started with the 3D library, 'rgl' (which I came
to the conclusion was either 'our GL', or 'relic GL' - I preferred to
call it the former ![]() ) and ported that so that I could do
basic 2D rendering. I created a very basic test to check that the functions
were doing what they should be doing. The test just calls the primitive
) and ported that so that I could do
basic 2D rendering. I created a very basic test to check that the functions
were doing what they should be doing. The test just calls the primitive
rgl calls for triangle and rectangle in solid and outline modes, and with
differently coloured corners, and some round rectangles. The two lines
are meant to show the difference between anti-aliasing and non-anti-aliased
operations. There's also a couple of 'blurry points' which would be used
for the running lights on the ships.
The basic functions for the rendering aren't that complicated, but since the order of pixels on RISC OS screens is the reverse of the expected order on other systems, there was a bit of poking around to reverse the operations so that we didn't end up with the wrong colours. As all the software pixel operations were macroised, it was quite easy to locate the main places where the pixel operations were performed for the bulk of the changes. There were some places that didn't use the macros which meant a few less obvious changes, but mostly it was pretty easy.
Having got 2D working, I embarked on the 3D side of the code. This was a little more tricky as there were a few operations that were more complex to handle. There were a few functions that were accelerated by inline assembler to perform matrix multiplications, affine transforms, and a few other things. The code would detect what sort of processor was in use and the capabilities from that. None of which was any use to me, as x86 is not so handy for an ARM system. In most cases there were C-native versions of the assembler variants, though, so they just ran slower than they might if they were hand-crafted - but they worked.
A few frames of the fountain.
Testing, though, was a little more difficult - I didn't know OpenGL in much
more than a hand-waving general way. For simplicity, I grabbed a copy of
MESA, and found an example which would at least test the basics of GL
were working. The 'pointblast' example was good enough, and so I just hacked
out the unsupported functions, and modified those that remained to do the
right thing. It wasn't that hard, because the rgl was pretty good for just
dropping other things in - as it was meant to be just a software
implementation that could talk to hardware.
I was quite pleased with this, although it had taken another day to get it working. I had a short break to go to visit friends who were getting married and then I was back to doing stuff - I compiled up the JPEG library that they supplied for screenshots and tried that out on the output of the 3D engine - all seemed to work.
I started on the font plotter next, as that used the graphics system and therefore was a simple layer up. This needed both the 2D graphics to work, but also needed the basics of the file access so that we could get at the font definitions that were embedded in the 'big' file. The file operations could work either on the 'big' file directly, or on the filesystem using the same structure as the 'big' file described. For speed and simplicity, most of the operations used the filesystem variants - it wasn't any different to the code - it merely accessed the data it wanted, and the 'file.c' handled all the translations. Similar really to the way that the lumps could be overlaid in Doom's WAD files.
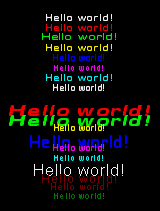
The font engine in a few formats.
The test I wrote for this was just a lot of calls to print 'Hello World'
in different fonts. There is probably not a lot exciting you can say
about the font plotting system really. It worked and the test showed it.
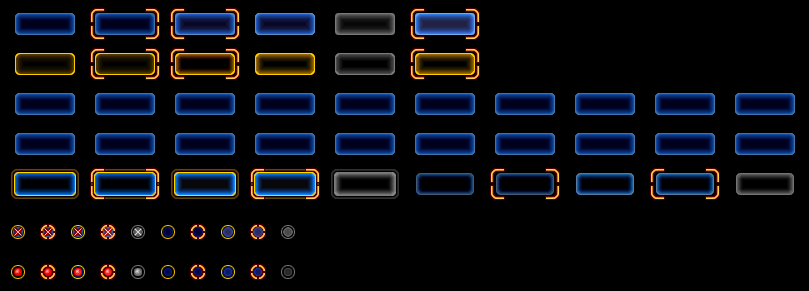
The graphics system and fonts were working, so I began work on the front end interfaces. The menu components relied on the 'front end render', or 'fer' libraries, so making these work was next on the plan. It was relatively simple although, as with much of getting Homeworld to work, associating what the libraries did with what I knew of the game from playing it was interesting. You don't appreciate the different ways there are to highlight a button - well, you might if you had done all the IconBorders stuff that I had done, but the point is that there are quite a few different states that the buttons can have.
The buttons themselves have a few major states in Homeworld - selected or not, active or not, focused or not, disabled or not. They are really quite nice and I still reckon they would work reasonably well in RISC OS as borders, despite the poor attempt I made previously. The test shows off the different forms of buttons and option icons. It is really not that exciting, but it worked.
I took a slight detour before the menus proper, and wrote some test for the 'subtitles' scenes. These were textual sections which described the spoken sections over the video and non-interactive cut-scenes, as well as introduced voices of the ship and commanders when events happened in the game itself.

But all the right stuff is there - the text is in the process of fading out.
At the same time, I also took the time to work through the 'big' file handling. Most of the code had been using the regular file-per-object implementation, which was all well and good but was a lot slower than just having a single large file open and seeking within it. I knocked up a simple test that would use the big-file access code to dump its contents. Essentially the test just sets up a few things, and then calls 'bigView' on the file - and out pops a whole load of information about the objects within it.
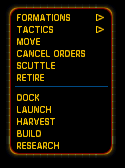
The pop-up in-game menus were
driven by the same menu system.
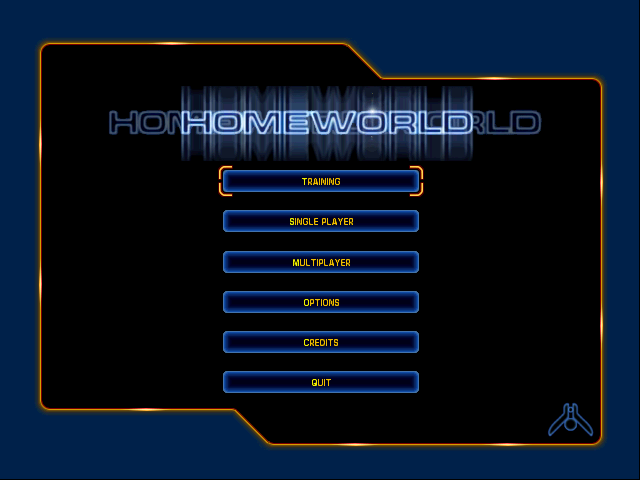
The menus were also pretty simple, and dropping the test for the 'fer'
in place with a few changes to call the menu system got something up
and running. The front end menu system is really quite self-contained,
and could be made to trigger other operations, or to automatically
traverse its own trees and invoke other menus. Essentially, there was no
real coding necessary to make a given menu work - everything was provided
in the script for the menu itself. Once the menu script processor worked,
it took over all the work from you.
Having got parts of the front end working, I began to look at parts of the game's engine proper. It is one thing to be able to render some menus and text, but in a space strategy game you generally expect to see... well, some space ships. And some space.
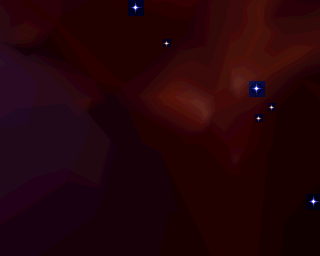
Background from one of the levels, viewed from within.
(Animated version (512K))
The background to the scenes in the game is rendered as a sphere centred
on the player's position. The image for the sphere itself is held in a
pair of files - the .btg and .hsf files. The BTG (named after the tool
that created it - Background Tool for Geeks) is actually just a collection
of triangles and their colours that will be mapped around the sphere, with
a blend between their vertices. There is also an animated portion that
I didn't look at.
I created another basic test that would rotate around the horizontal plane and render the background from mission 3. The speed was not great, but it was relatively easy to see that it was doing the right thing. The stars seem to shine through, which probably means that there's still issues with the sprites that are placed on the background, but it is working - and it shows that the 3D engine is actually doing its job within the game itself.
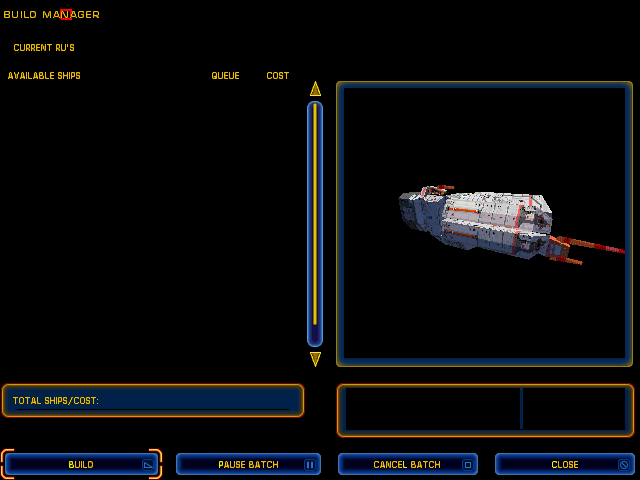
Having got the space working, I wanted to get some ships. Whilst working on the menu code previously, I had managed to get a barely functional construction manager working. Essentially all the static furniture was present, but I had stubbed out all the dynamic data so that it worked but displayed nothing useful. There was a lot of data for the ships, and to keep the compile and load time down, I had kept only the parts of the code that I needed to work on at the time.
The whole makefile system was relatively simple, and included a top level definitions file that had the libraries and paths that I had got working to date. This meant that as later libraries were made to work, the earlier tests could break. I would have to go back to them and rebuild them to see what state they were in. Usually they found themselves unable to link because the functions that I had created stubs for were now present in the libraries I was linking. Usually just removing the stubs made things work. Occasionally the earlier tests broke because I had made incorrect assumptions about what would be needed when the real code was linked in, but mostly new functionality became available.
The libraries that had been made to work for the 3D scene were a little way towards getting the ships to work - as they were just models as well. The construction manager had a view on to the ships you were creating and as this was intentionally set up to be in a known location, with camera and rotation set sensibly, I decided to use this. I created a test that would invoke the construction manager with the barest amount of statistics about ships, and told it to render an Attack Bomber. After a little bit of messing with parameters, I had a working wireframe model!

In Homeworld: Cataclysm the ships would start out wireframe when you selected them and be wiped into solidity with the full textures, if I remember rightly. But in Homeworld they just started out textured in the game when you picked them. I spent half a day - and then a lot of the night - trying to get the textures to work, but they resolutely refused to play ball. I had wireframe working... but when textures were enabled the whole thing would just vanish. Frustrated, I went to bed in the hope that things would seem better in the morning.
They didn't. I spent another few hours trying to see what I had missed, tidying up the bits I had, and implementing functions properly where they might affect the rendering. I even tried a few other models in case there was something about the particular model I had selected which meant that it didn't work.
Eventually, I noticed that there was a very, very dark image present,
maybe using the darkest grey that wasn't black. With this in mind,
I searched back through the code for some lighting that I must have
previously disabled when the code for it wasn't yet linked in -
and in the shipview there was a rndLightingEnable(TRUE);
which was commented our with ifdefs. Re-adding the code and... whee...
we have a ship!

Of course, once you've got a 3D object on the screen you have really got to rotate it - it is just a further step you have got to do, like 'Hello World'. Like the background before it, rotation and screen capture code was added for the destroyer. The actual rendering was quite slow, getting something like (off the top of my head and it was 6½ years ago that I did that) about a frame per second.
But in the animation we can pretend it's a lot better than that. It does look reasonably nice.
(Animated version (1124K))
Having 3D graphics processor drawing ships, and a ViewFinder in my
desktop system was too good a chance to miss. I modified the triangle
fill code so that instead of plotting plain triangles it queued commands
to the 3D engine to plot a primitive triangle. It is still a quite costly
thing to do because we have to marshal all the data for processing by
the 3D system, and obviously we have to do all the Floating Point that
it takes to get the data there, but it takes away the actual rendering.
The improvement on just doing this in a very rudimentary way was quite
good - it more than doubled the speed of the rendering. For some scenes
we could almost get 2 frames per second! ![]()
I wasn't at all disappointed by this, as it showed that there were some significant gains to be made just from the graphics system, which bore out my previous timings that indicated as much. However, as I didn't like to test on my main desktop machine, the ViewFinder work didn't go much further.
I took small diversion from the graphics to investigate the sound. The sound samples were stored in a special format and needed to be extracted before anything could be done with them - this took a while. A Windows machine was left extracting the files, and I set about writing a stream interface that could process the results. As I had done a lot of work with AMPlayer and it was to hand, I converted the files to MP3s and made the stream interface read from the MP3s that had been generated. These worked reasonably well, and I tried a few different levels of compression to see what was going to be acceptable. Whatever I did, MP3s would not be a good final solution, because they were heavy on CPU time and we didn't have a lot left over, but they would give some sound output which would be a good start.
The music tracks seemed to work ok, and there were a variety of samples of different sizes for different phrases which were played at different times. For example, 'Group 2 assigned' would be 3 samples - one for each word. But there were other phrases which were played randomly when one was needed, so the 'I'm under attack' sound might be that one phrase, or 'Taking damage!' or something similar. Much of this was taken care of by the game, but it meant that the streaming interface had to be able to take multiple inputs to play in order to build up a phrase without pause. It worked reasonably well in tests, anyhow.
There were also longer sections, such as the ship's comments as you return to Kharak to find everyone dead, its atmosphere burning. Made all the more poignant by being backed by Samuel Barber's 'Adagio for Strings'.
I added some remaining functionality to the menus, so that the mouse and keys worked, clicking taking you through the menu tree, improved handling of the background music and a populated (but still not very useful construction manager). The menus were particularly nice as you could move around quite well without having much else working.
At this point I had spent over 2 weeks (allowing for weddings and visits to TV studios) on the source, and it was time to take stock of things. The large amount of 3D which was inherent in a 3D strategy game meant that there was going to be a lot of FP in there, and that just would not perform well. It needed to be fast when rendering the scene, and the performance just wasn't there - even with the ViewFinder accelerations it'd be a miracle to get my 10fps that I considered the barest acceptable for a playable game when I was working on Doom.
Clearly there was a lot that worked, but there were a lot of things that were still not there - the 3D software renderer didn't seem the have alpha-channel working quite right, and was in any case very slow, the 'game' part of the code had not really been explored, and large chunks of the unit AI were never even compiled because they were not needed for the components that were under test.
A quick count of the object files for the bits that had been ported put the size at over 30MB (counting them now, I get 41MB). Even allowing for the symbol tables, relocations, and debug data, you're looking at a sizable amount of data, and that's before we deal in the zero-init data and data that will be allocated at run-time. Moving things into Dynamic Areas just wasn't going to be practical.
"We're going to need a bigger boat", as the quote goes, so that's when I started to make one...
Disclaimer: By submitting comments through this form you are implicitly agreeing to allow its reproduction in the diary.